Saturday, October 1, 2022

Chip's Wood Shop Becomes a Foundry!

I needed to add some weight to a wooden base.  I'm always finding wheel balance weights on the road when commuting on my bike.  Wheel balance weights are made of zinc, lead, or steel.  Zinc and lead both have melting points below 500F, making them easy to cast with steel tools and a propane or propylene torch.  In this video, I melt down some weights and cast them into a piece of half inch steel tubing, which I can later insert into holes in the wood base.


Monday, September 12, 2022

Chip's Wood Shop Live! A vise is born.


 This time I fixed the camera in one spot and not to my person.  I can see where different situations could call for each, but I suspect I will prefer the fixed angle when possible.  

In this episode, I harvest parts from a broken clamp and route a pocket for my homemade nutplate to fit inside my benchtop to engage the screw that will draw the vise in and clamp material against the bench dogs.

Sunday, September 11, 2022

Now streaming on Twitch!

 Today I built and tested a setup for streaming on Twitch.tv. I've wanted to share my weekend garage therapy with interested people without the editing needed for my published videos. As this is my first test of live streaming, I am open to feedback and recommendations.


My projects in progress include a wooden bench top made of scrap butcher- block counter top, as well as a table top for my radial arm saw (RAS), including aluminum T-track.  I have some more modifications in mind to test on the RAS, which will need the table top to hold workpieces firmly in place. 


Saturday, April 23, 2022

A DIY Winch

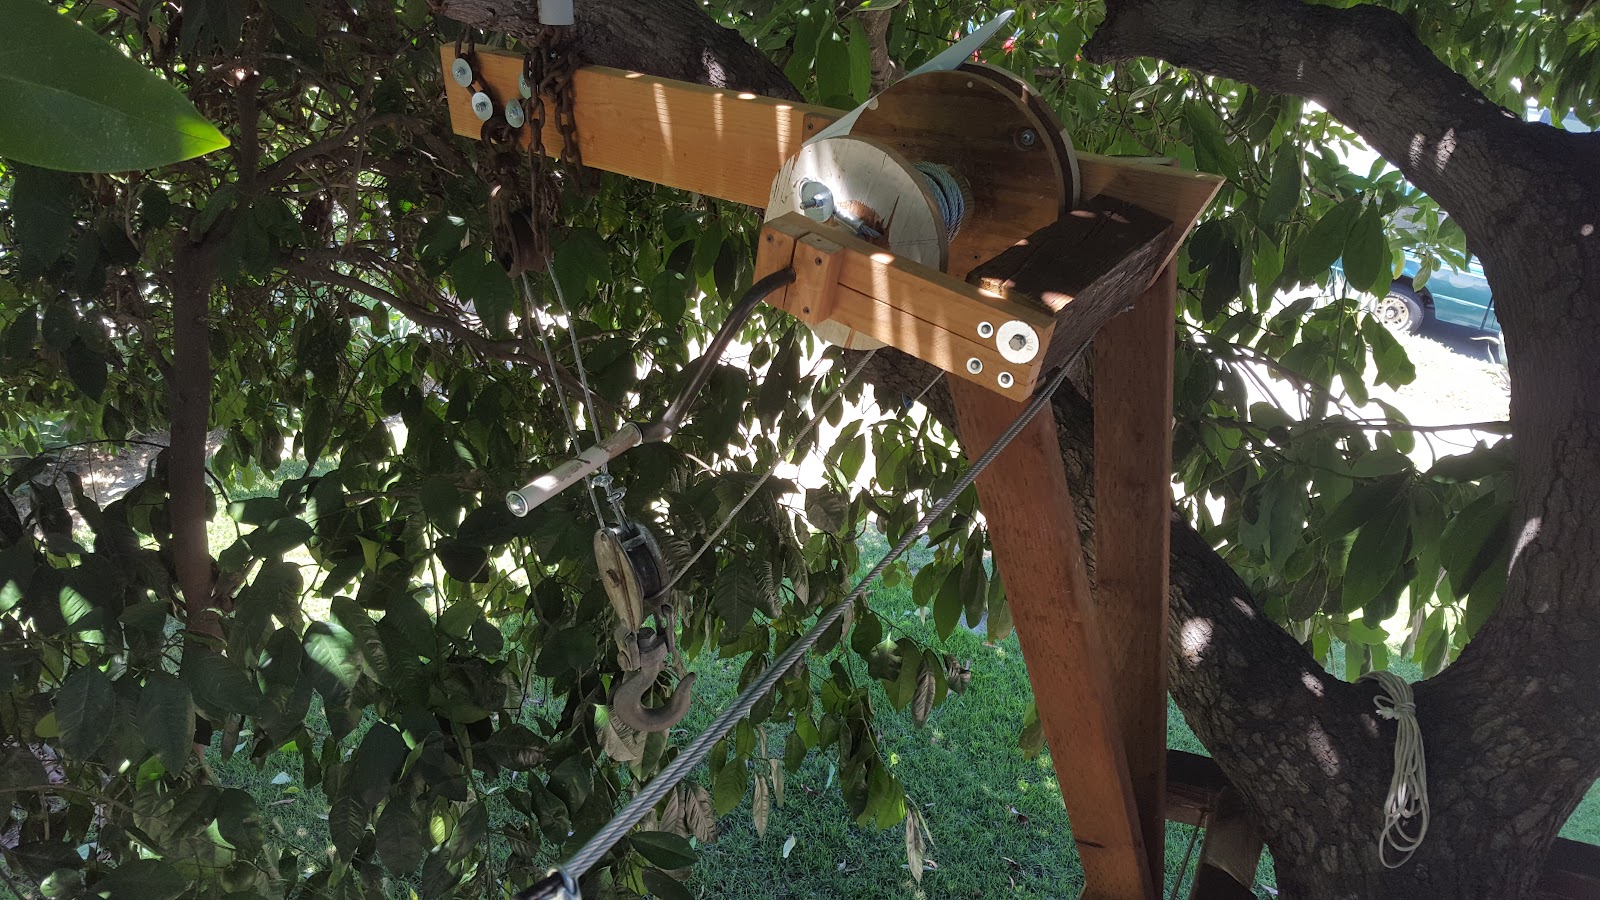
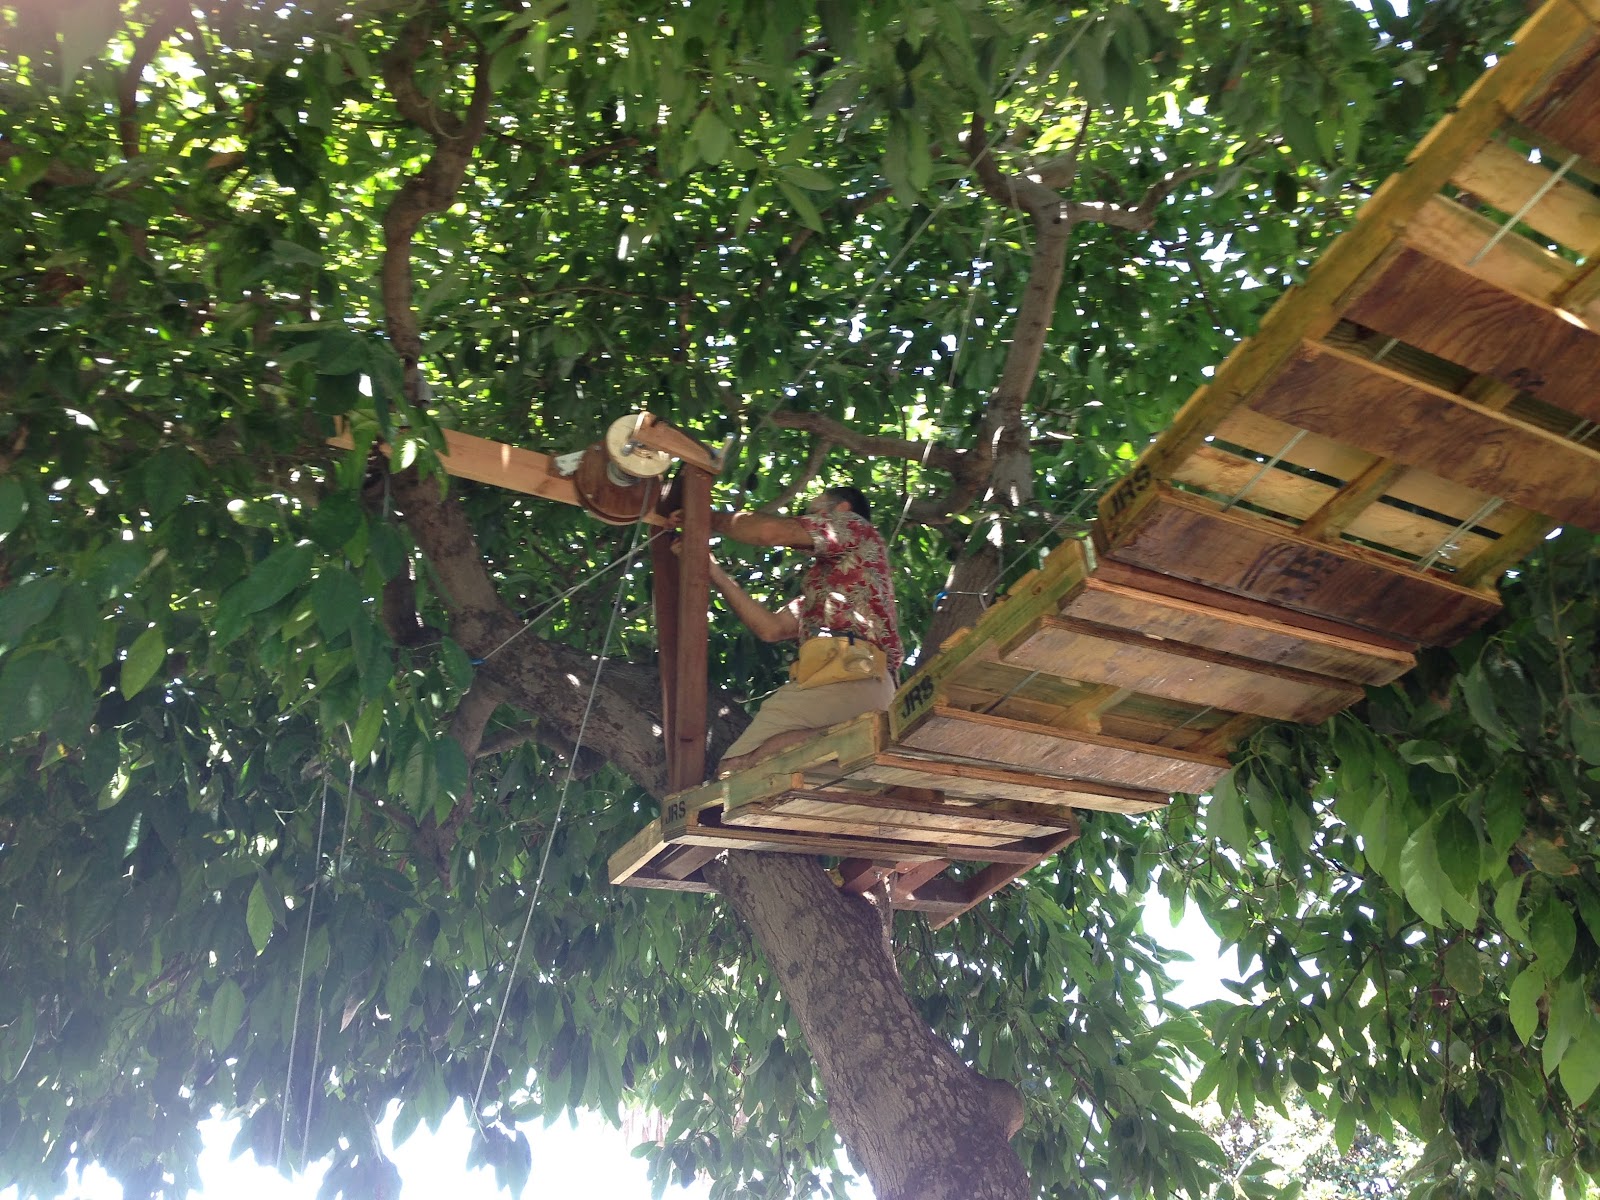
For our tree house, I wanted a winch to lift up heavy materials.  
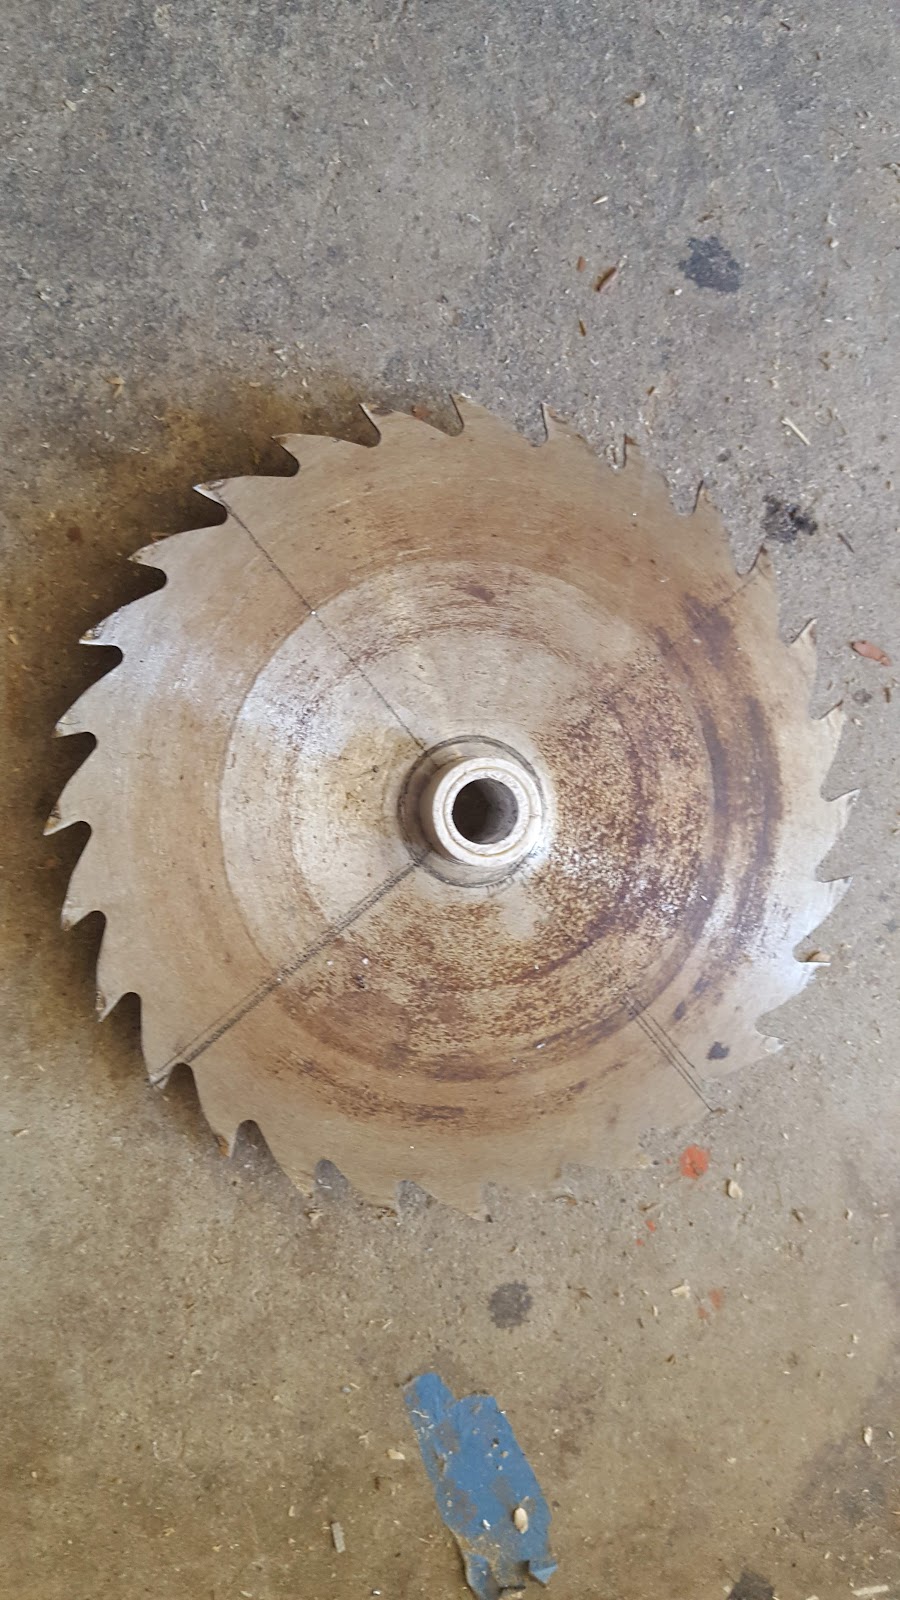
 I found just the trash I needed to make it from, starting with a saw blade I have no desire to ever use to cut wood. (I'm too spoiled by carbide).
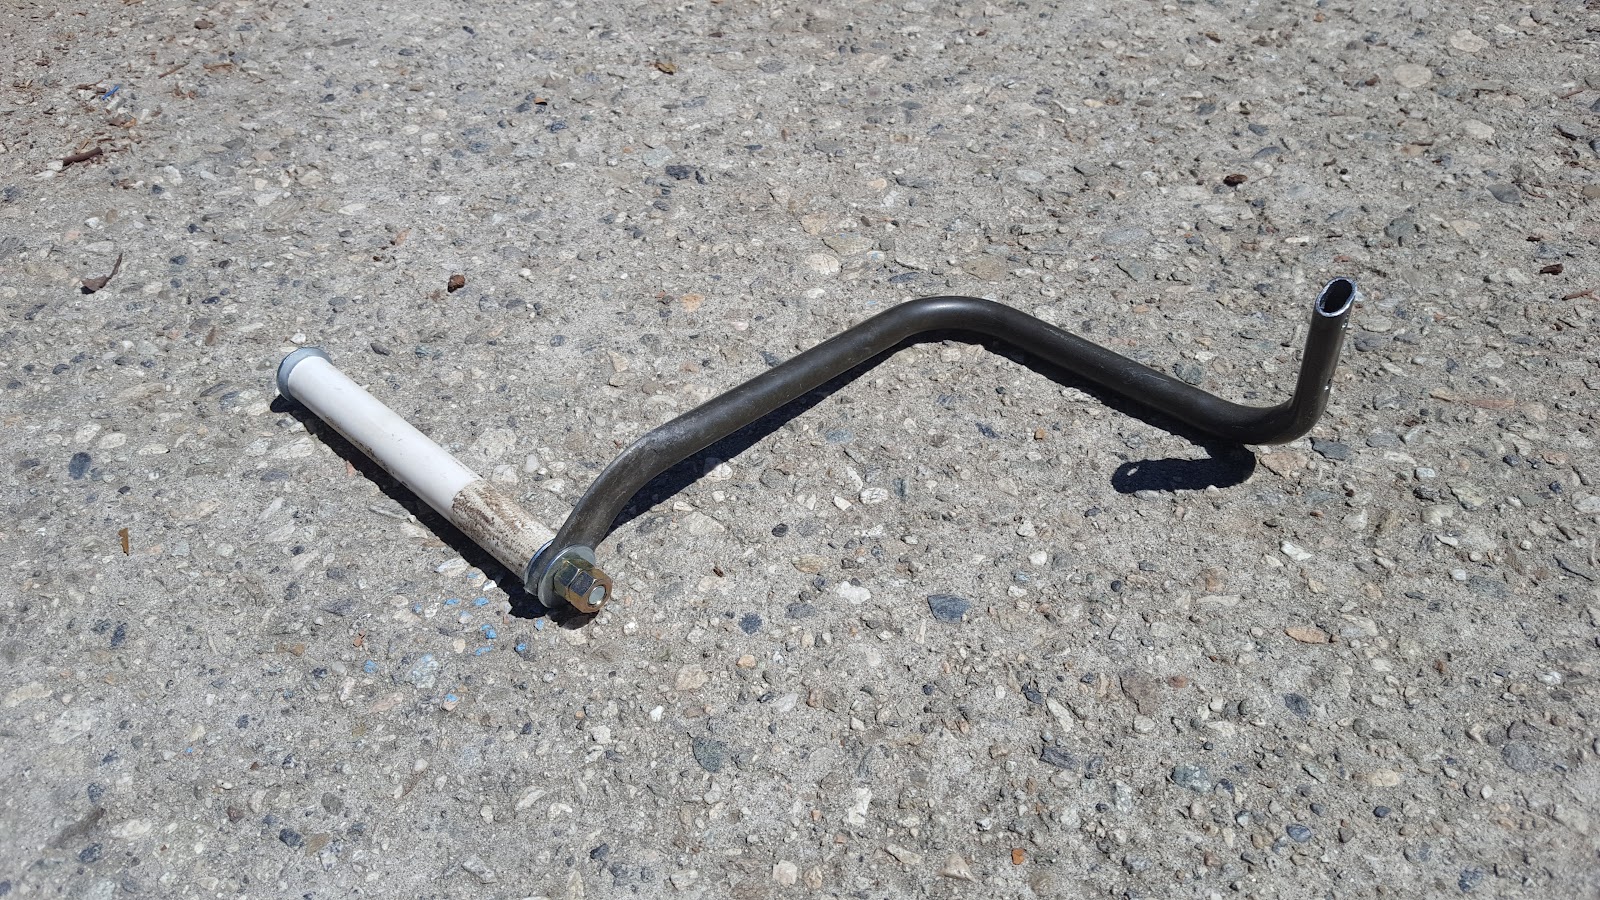
I formed a piece of scrap steel tubing into a crank.

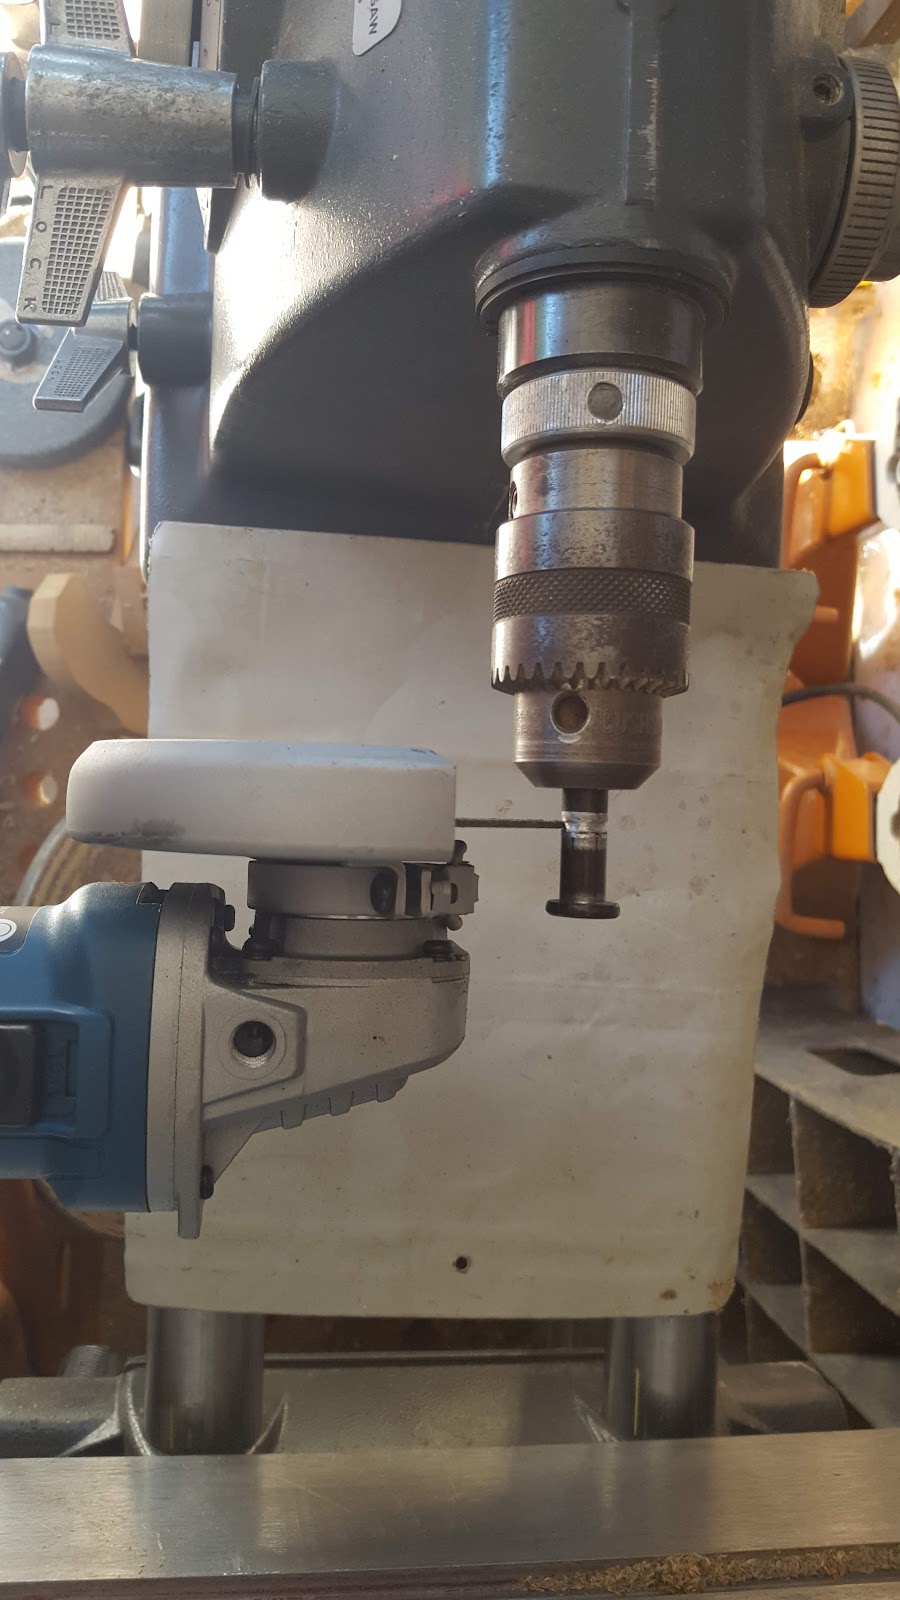
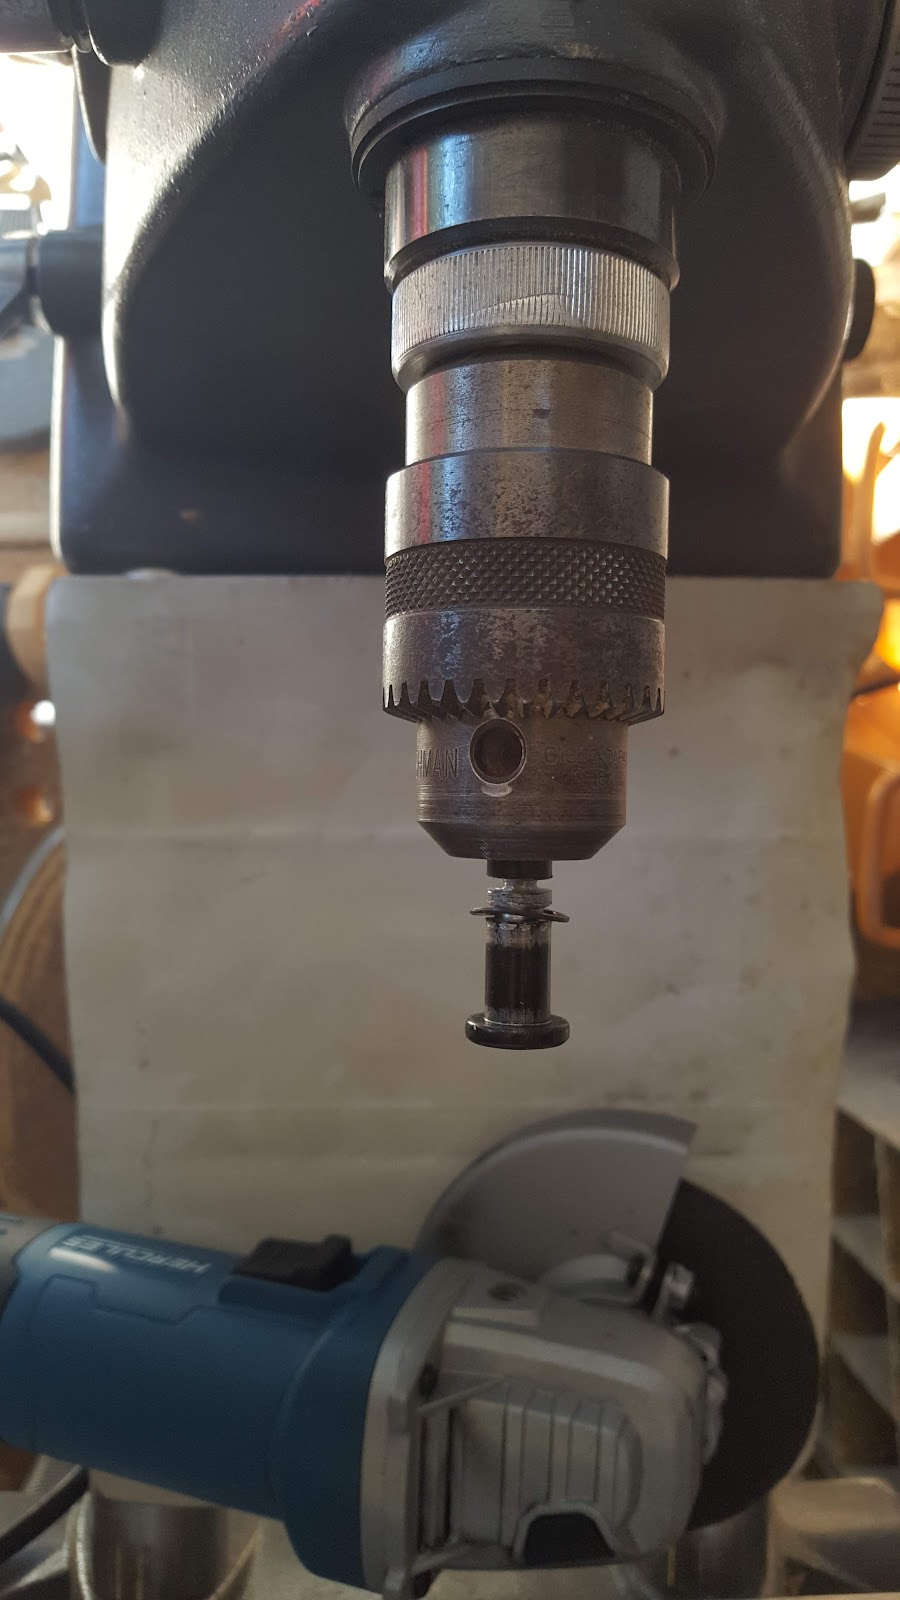
I needed a pawl to stop the winch on the saw teeth as a safety against falling loads. I cut a snap ring groove in a pin with an angle grinder and the drill press.

And added a snap ring.

I cut a few plywood circles for each side of the drum and to enclose the saw.


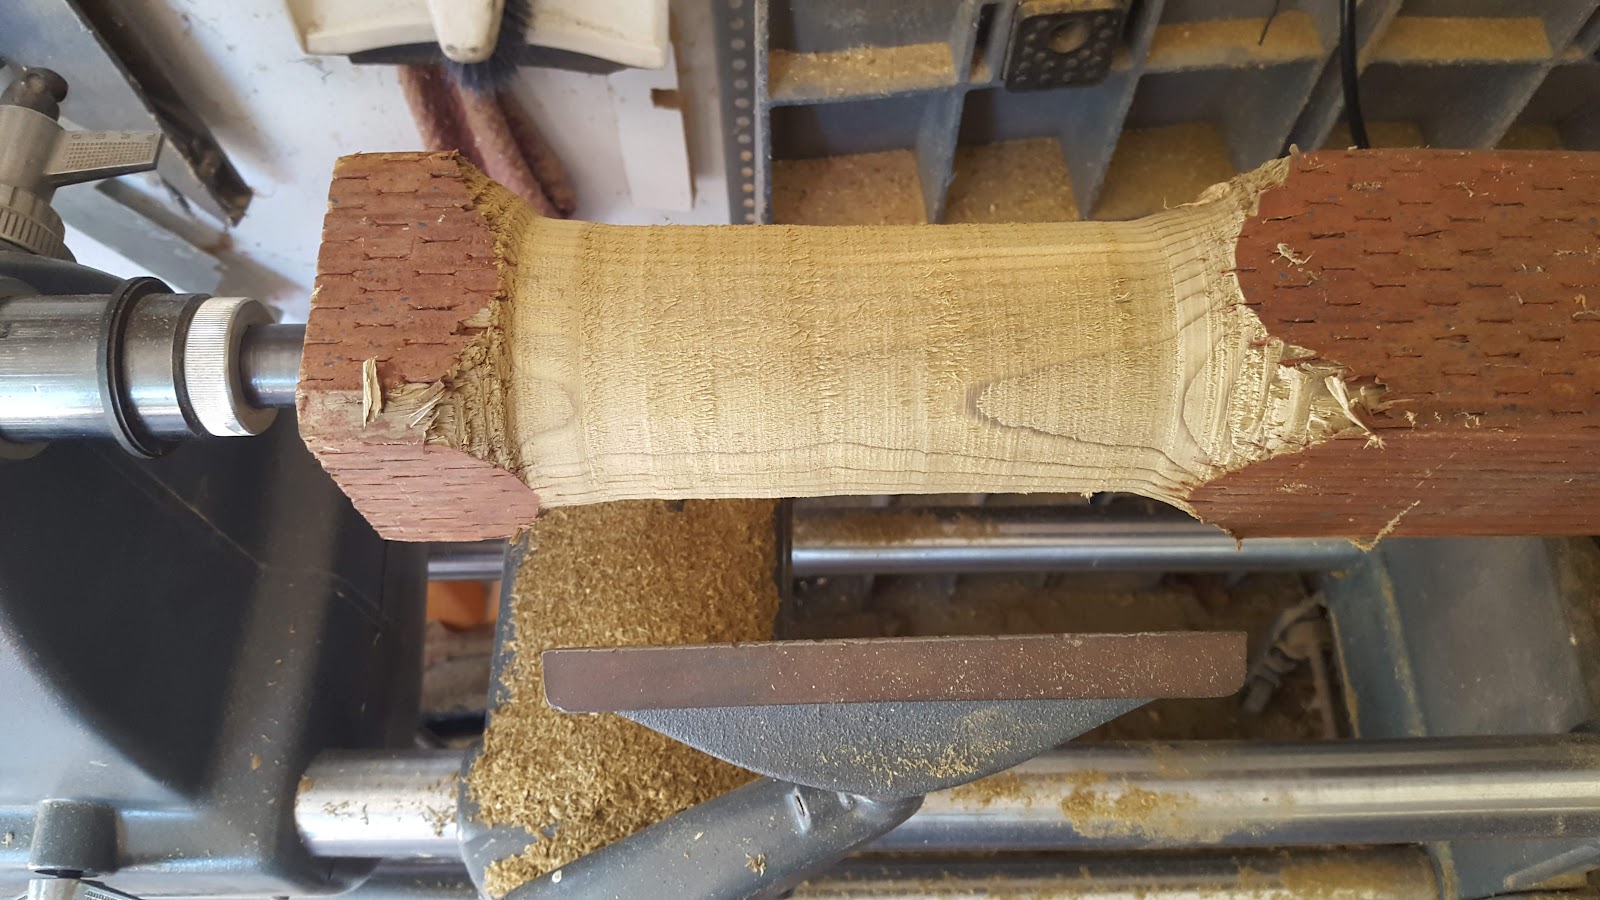
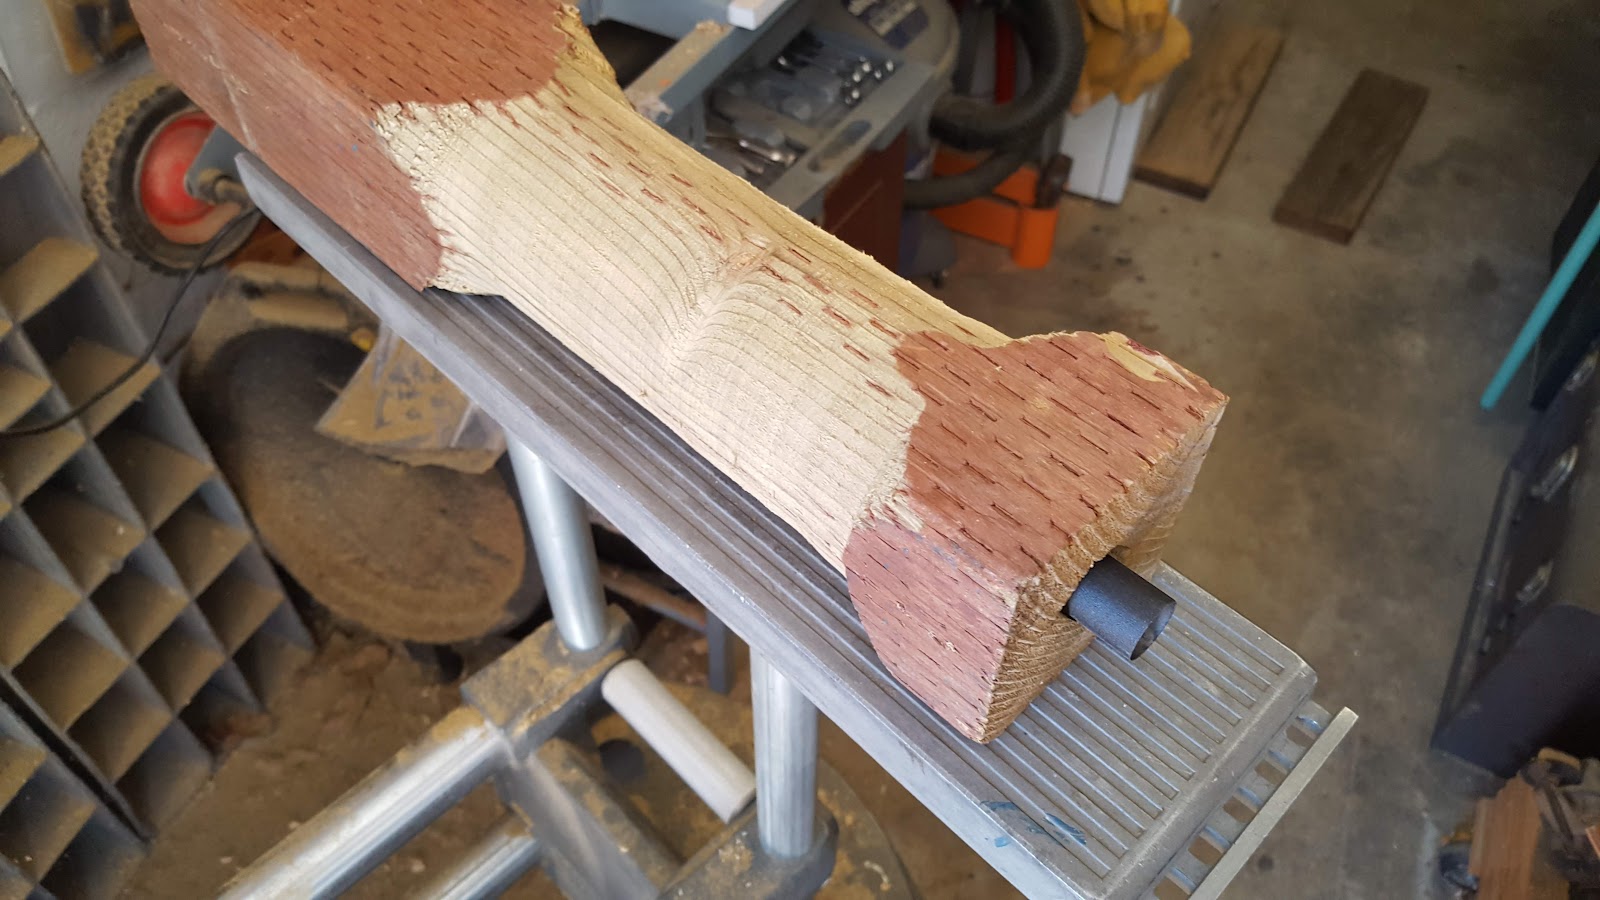
I turned a drum from a 4x4.


To put a straight hole through it, I first cut it in half.


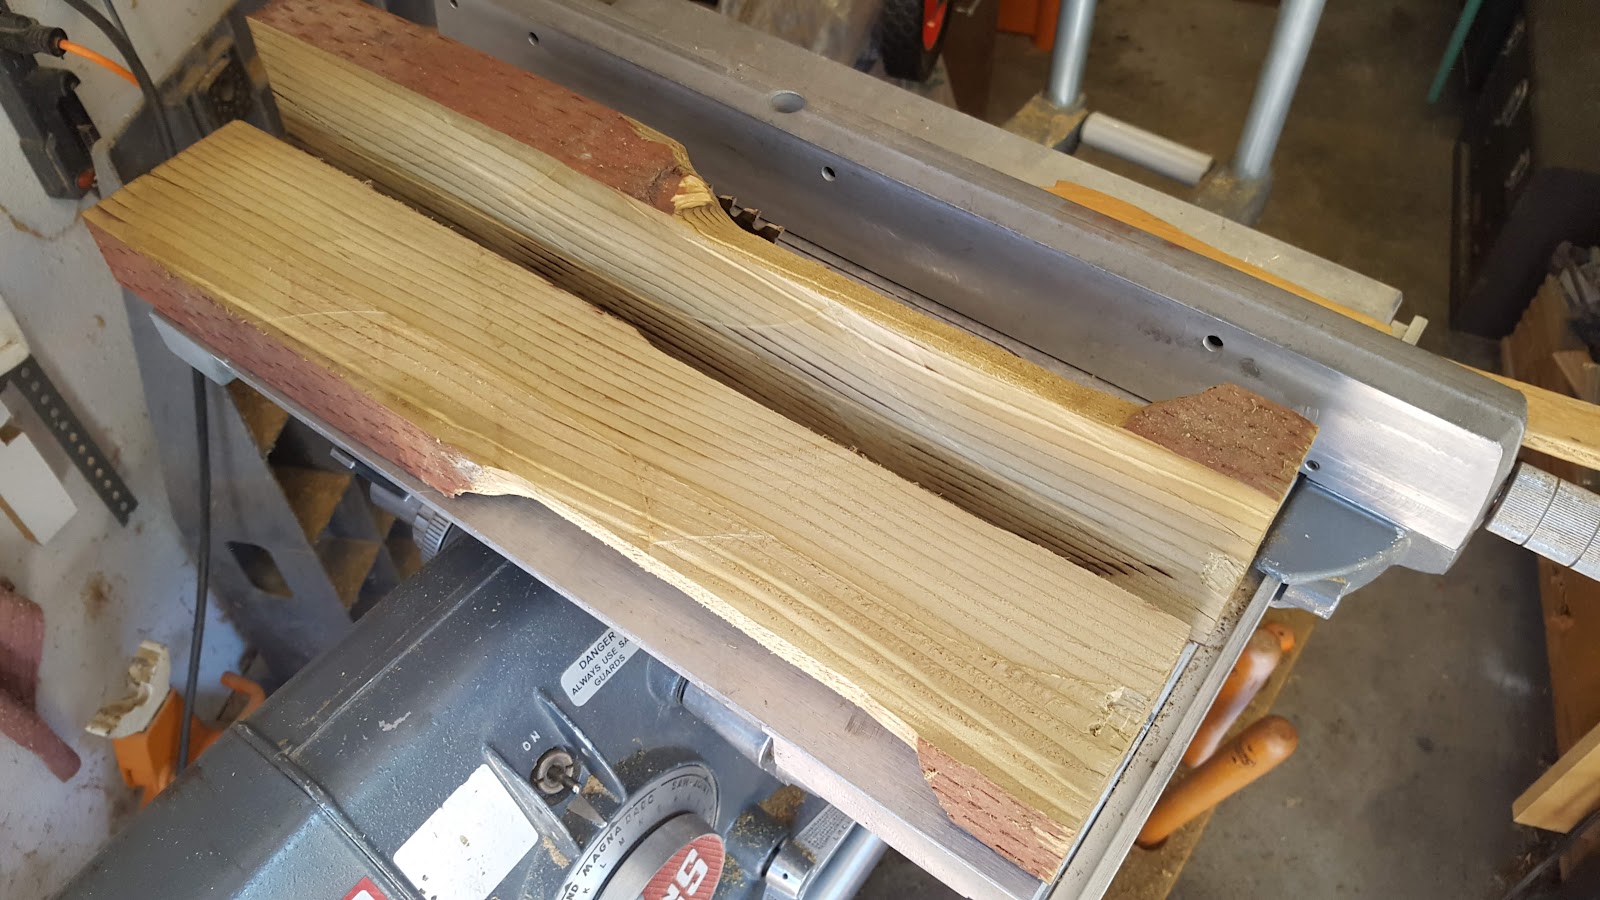
Then I cut a notch down the middle of each half, making a diamond-shaped "hole".

 Then I glued the halves back together and added a shaft of steel tubing.

Then I built a frame to hold it up and put it all together.  The pawl consists of a closet shelf bracket with the pin through it to catch on the saw teeth.  To lower a load, you raise it up and out of the way so it doesn't catch the saw teeth as you control the speed with the crank.
T